Table of Contents
Managing Tickets with DeskDirector
 Updated
by Niamh Ferns
Updated
by Niamh Ferns
Overview
To see how to manage tickets via the legacy approach, see What is the DeskDirector TECH Portal?
Upcoming Features
We are currently building out a completely new and improved ticket management UI. This new ticket management UI will give you a new ticket list, where you can cleanly and effectively filter for tickets, and a ticket UI where you can work on your tickets in a more user-friendly manner. Below, we provide an overview of the new ticket UI
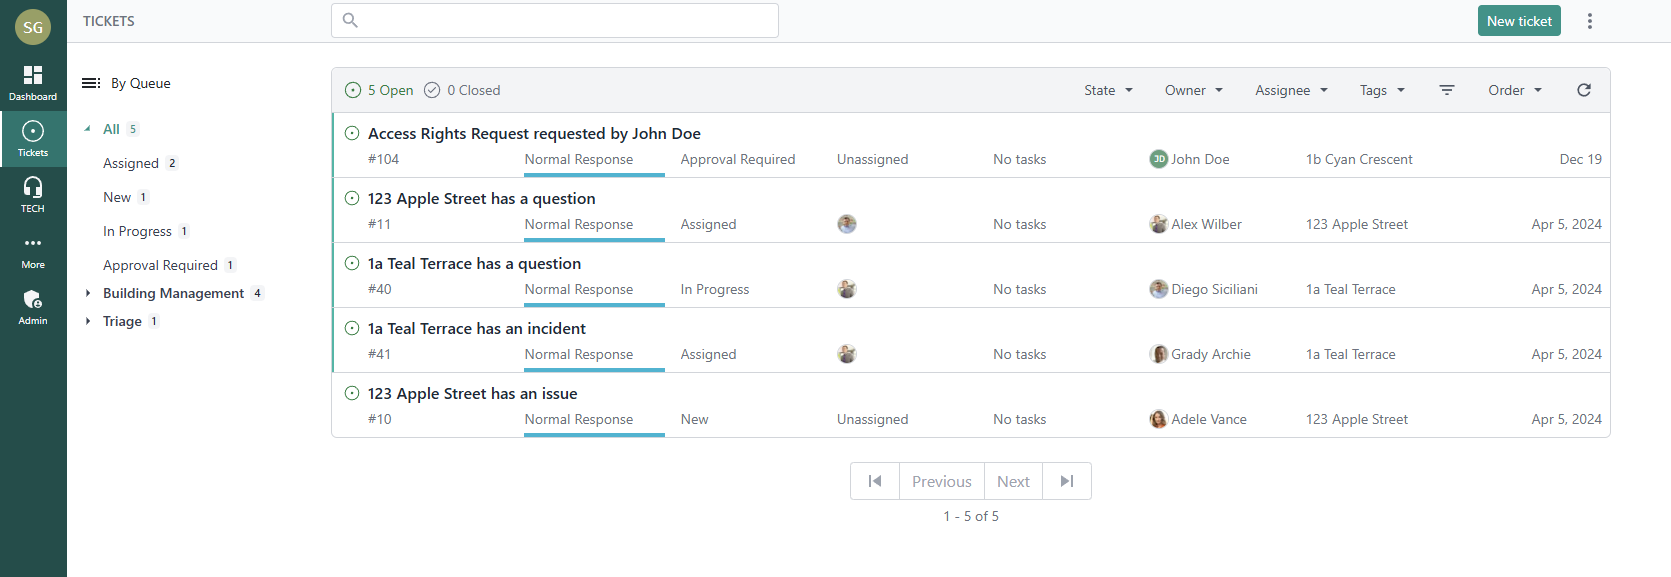
Ticket List
With the new ticket list, you can create tickets, filter for specific tickets, and browse for tickets that need your attention.
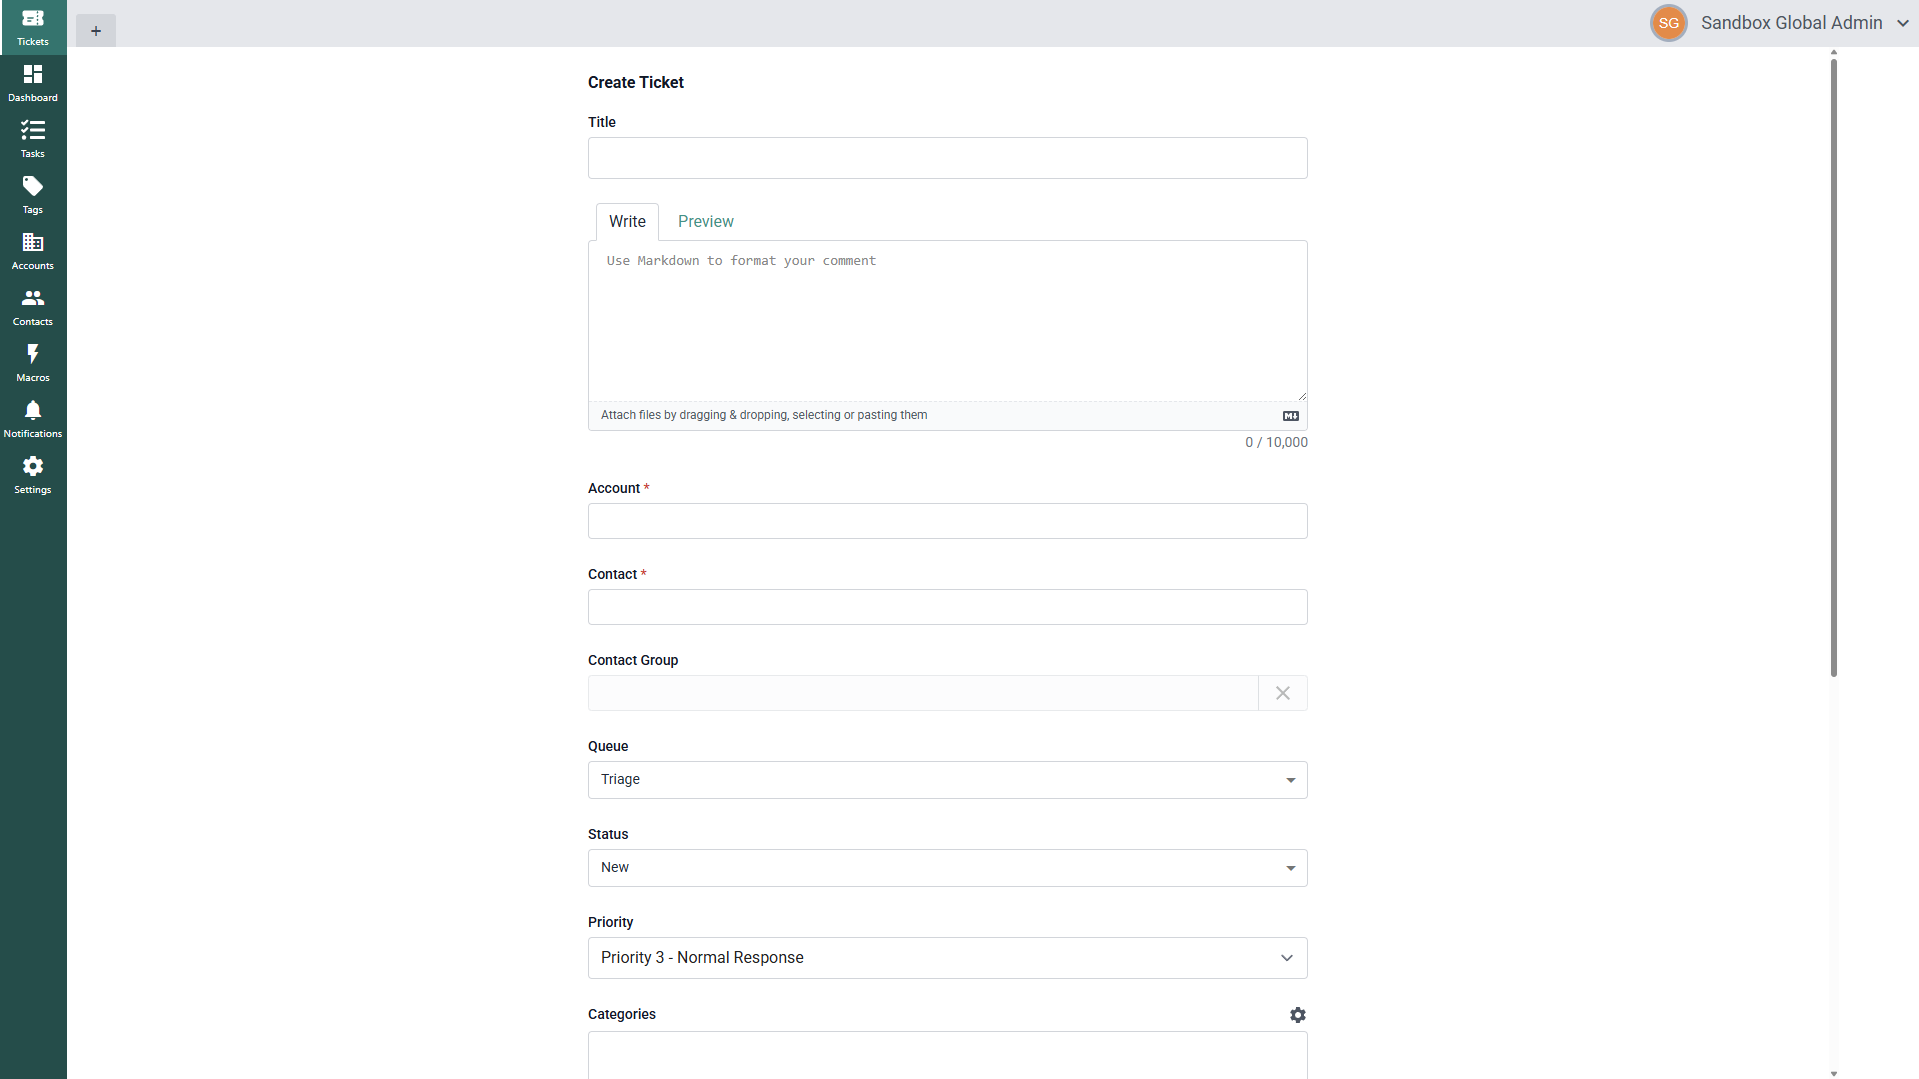
To create a new ticket, select New ticket and then fill in ticket details as you normally would:
Filtering for Tickets
Below, you can see all the interactive elements for the new ticket list UI:
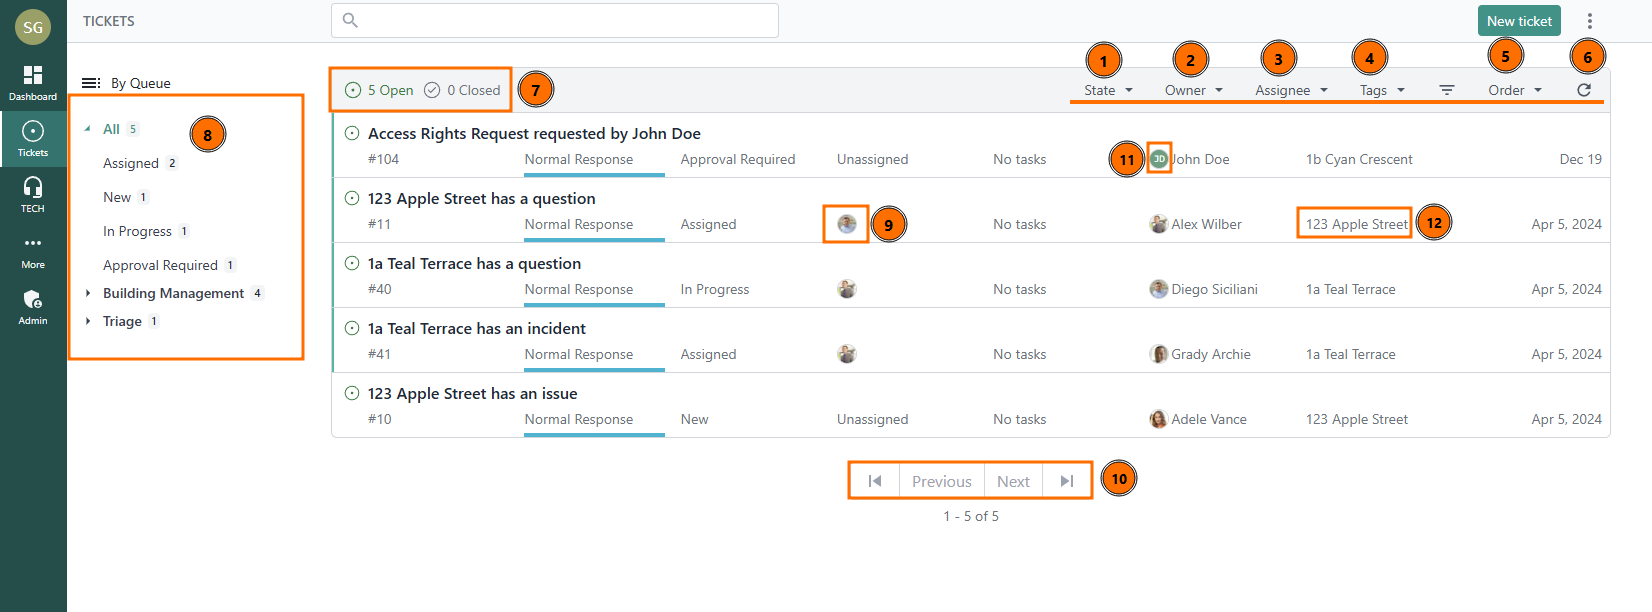
There is a set of filters that you can use for:
- Ticket State
- Ticket Owner (Contact)
- Ticket Assignee (Agent)
- Ticket Tags
- Decide which filter to order by and whether they're ascending or descending
- Refresh your ticket list for updates
- Select whether you're looking for open or closed tickets
- Select your primary filter (by default, this will filter by Queue):
Within the main ticket list portion of the screen, you can:
- Quick filter for the ticket assignee
- Switch between pages
- Quick filter for the ticket contact
- Quick filter for the ticket company
Multiple Filters
For agents that need to function across multiple queues, contacts, and more, we've added the ability to select multiple primary filters! For most users, this will be useful in filtering by multiple queues.
To get started, select a queue that you'd like to start with and then hold control and click on the other queues/statuses you want to filter for:

Working on Tickets
To start working on a ticket, select the ticket you're interested in, and you will be presented with the new ticket interface:
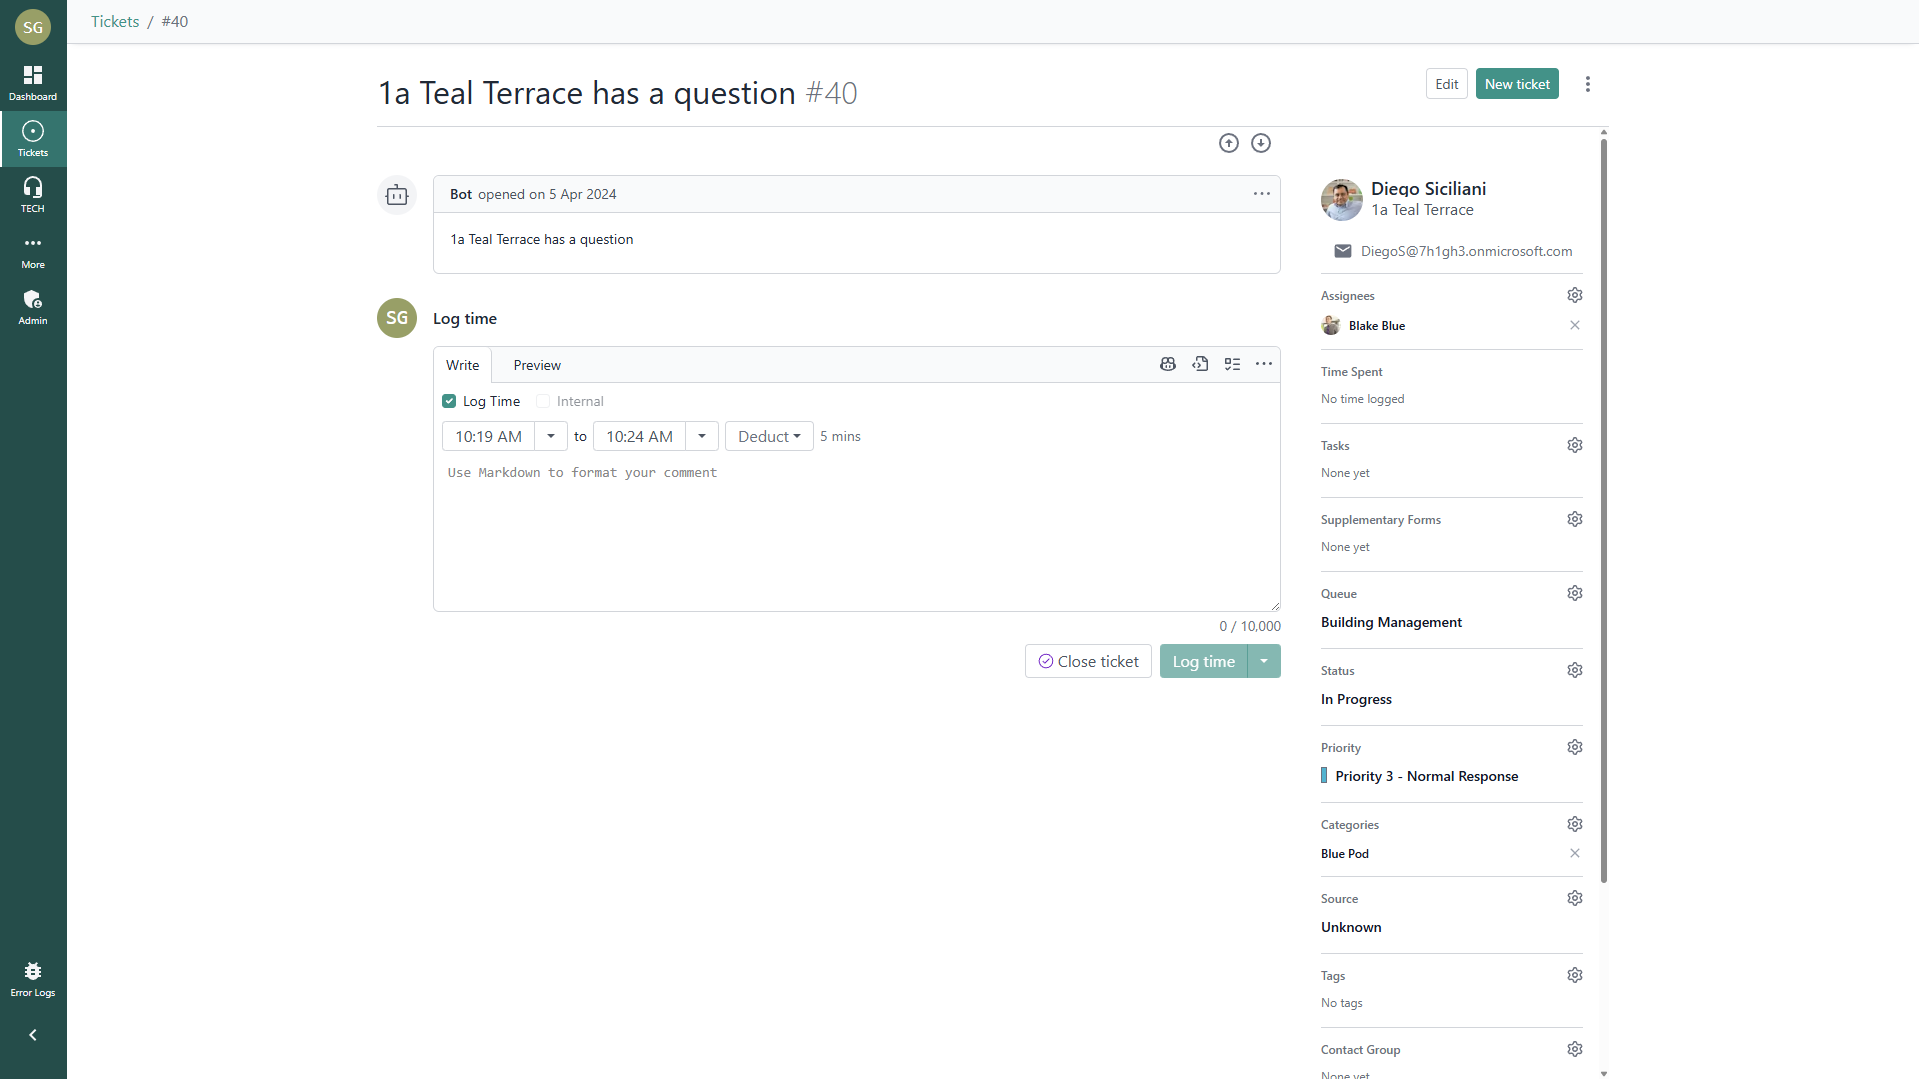
Here, you can:
- Add time and notes
- Update the ticket's details
- Assign members and contacts
- Perform ticket actions like closing, reopening, and requesting further information
Adding Time & Notes
To add time to a ticket, make sure your ticket is not marked as an internal note, then add your details. You then select the Log Time checkbox and add your start time, end time, and any time that should be deducted.
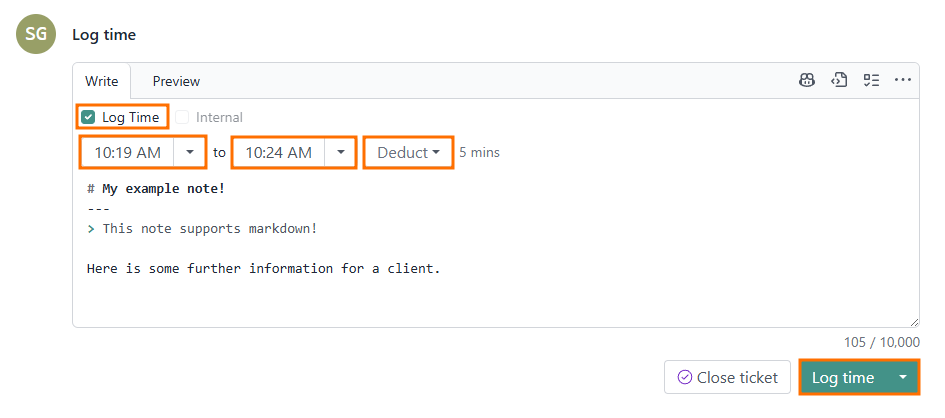
If needed, you can preview your note and then submit.
If you don't need to log time, you can uncheck the Log Time checkbox and optionally select the Internal note checkbox if your entry contains sensitive information.
If this is the final note on a ticket, you can select the Close ticket button instead to add your note and close the ticket immediately.
Updating Ticket Details
On the right-hand side, you can further update the ticket as needed:

- Assignees: assign agents to work on a ticket
- Tasks: add tasks to your ticket
- Supplementary Forms: submit additional, inline forms for your client to respond to
- Queue: update the queue/board
- Status: update the status
- Priority: update the priority
- Categories: update the ticket category
- Source: update the ticket's source
- Contact Group: assign the ticket to a contact group
- Edit the ticket title
Additionally, you can select the contact to:
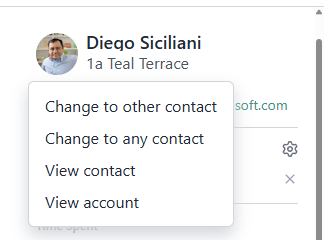
- Change to another to other contact for the account
- Change to any contact in your DeskDirector instance
- View the contact details
- View the account details
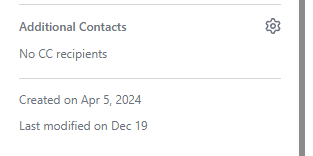
If you scroll down, you can add additional contacts to a ticket as well: